Successfully installing sod requires several important steps, some even before the sod even arrives at your site. Below, we’ll walk you through the entire process, so that your investment — i.e., your sod purchase — pays off with an attractive, durable and highly usable turfgrass surface for years to come.
Unfortunately, many people hurry through (or even skip entirely) site preparation. Please don’t be tempted to do so yourself — even the highest-quality, most-beautiful sod simply won’t grow on bad soil.
Site Preparation
Start with bare soil
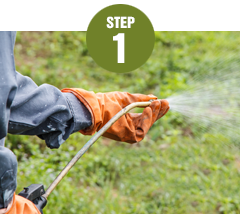
For sod’s roots to grow down into the new soil, they must have good sod-to-soil contact — therefore, sod should be put down on top of bare ground. If you wish to install sod over an existing stand of turfgrass, first apply a non-selective herbicide to eliminate all plant growth (grass and weeds) that is already there. Preferably, this should be done a few weeks before the intended installation date, to allow for a second herbicide application on difficult-to-kill weeds or grasses (such as common bermudagrass).
Loosen the soil, and add amendments
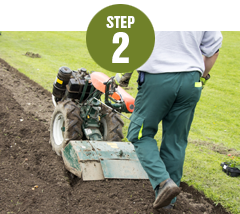
After all existing plant growth has been killed, loosen the soil with a tiller to a depth of at least 4” to 6”. This will reduce soil compaction, enabling the new sod’s roots to more easily grow down deeper into the rootzone. This is also an ideal time to apply and till any recommended starter fertilizer and amendments (such as topsoil, compost and/or lime) into the top several inches of soil.
After tilling, remove any debris that could interfere with the sod’s root growth and water movement into the soil, like rocks, sticks, tree stumps, construction scraps and even large dirt clumps.
If an in-ground irrigation system will be installed, this should be done after the ground has been loosened, but before the final surface is prepped (Step #4). And, if the sod is to be installed during the heat of summer, make sure the irrigation system works, before the sod arrives.bermudagrass).

Smooth and firm the soil surface
Firm the freshly tilled soil by irrigating and/or rolling with a lawn roller one-third full of water. This will reveal any low areas that need more soil. Keep the grade 1” below sidewalks or driveways.
Finish-grade the entire site with a heavy-duty rake for smaller sites or a tractor-mounted box blade for large areas. Whenever possible, this step should be done by hand with a rake; running a drag behind a tractor will significantly compact the newly loosened ground.

Moisten the soil before the sod is delivered
After all existing plant growth has been killed, loosen the soil with a tiller to a depth of at least 4” to 6”. This will reduce soil compaction, enabling the new sod’s roots to more easily grow down deeper into the rootzone. This is also an ideal time to apply and till any recommended starter fertilizer and amendments (such as topsoil, compost and/or lime) into the top several inches of soil.
After tilling, remove any debris that could interfere with the sod’s root growth and water movement into the soil, like rocks, sticks, tree stumps, construction scraps and even large dirt clumps.
If an in-ground irrigation system will be installed, this should be done after the ground has been loosened, but before the final surface is prepped (Step #4). And, if the sod is to be installed during the heat of summer, make sure the irrigation system works, before the sod arrives.bermudagrass).
Installation Tips
Install the sod immediately after delivery
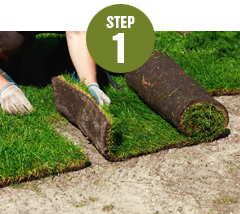
Do not order your new sod until the site/soil preparation has been completed, since sod should be installed as soon as possible after it arrives at the site (preferably the same day). The longer the sod sits on a pallet, the more it will deteriorate, particularly in summertime. In hot weather, protect un-laid sod by placing the pallets in shade, covering them with moist burlap bags and/or sprinkling them with cool water.
Roll the surface
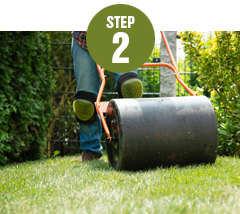
After installing the sod, roll the entire surface to remove air pockets and improve sod-to-soil contact.

Irrigate soon
Begin watering newly laid sod within 30 minutes of installation. Turf is a living plant that requires ground contact and moisture to survive. If the weather is particularly hot and dry, you may need to start irrigating the completed areas before the entire site is laid.
Until it has rooted, new sod will require a fair amount of water. Keep an eye on weather conditions, and every day, pick up a corner of a sod piece to check the soil underneath. Irrigate often enough to keep the soil damp/moist but not saturated with puddles on top.
Within a couple of weeks, after the sod’s roots have started growing down into the soil, you will not have to water it as much. In fact, after the sod is well established (several weeks after installation), irrigating deeply and infrequently will encourage the turf’s roots to grow further down into the soil, ultimately making it more tolerant to drought.tact.
Mowing
Mowing should begin one week after installation. Mower height, sharpness, cleanliness, and mowing schedule can make the difference between a lush green lawn and a brown weed infested one. The following are mowing tips that will help keep your lawn looking its best:
Sharpness
Mower blades must be maintained in sharp condition to keep your lawn looking its best. Dull blades do not cut, they tear, which results in damaged blades that will give the lawn a brown cast. A sharp mower will leave the grass blade with a straight tip and minimal damage or browning.
Cleanliness
Make sure your mower is clean of weeds and other contaminants prior to cutting your lawn. Weeds like common Bermuda, crabgrass, and kikuyugrass can be transferred from one lawn to another if they are cut with the same lawn mower.
Schedule
Most lawn varieties require weekly mowing during the growing season. Letting your lawn get too tall between mowings, can cause damage. In general, it is not recommended to mow off more than 1/3 of the blade height. Warm season varieties do not require mowing during the winter months if they have gone dormant. Cool season varieties like Marathon will slow down significantly in the winter months. In some instances, you may be able to mow your lawn once every second or third week. Be careful not to allow your lawn to get too tall between mowings!